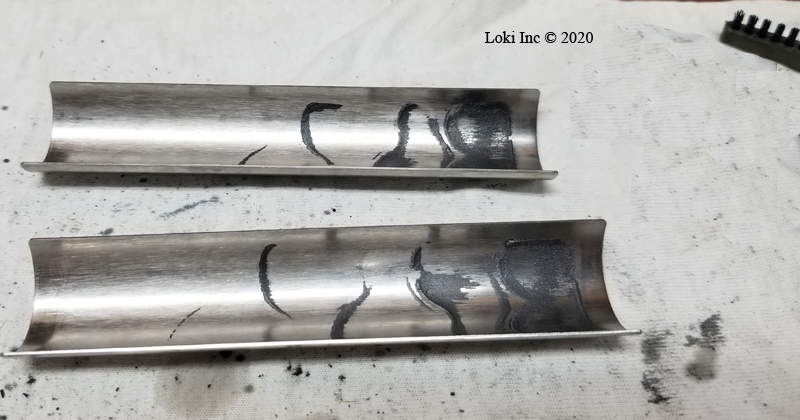
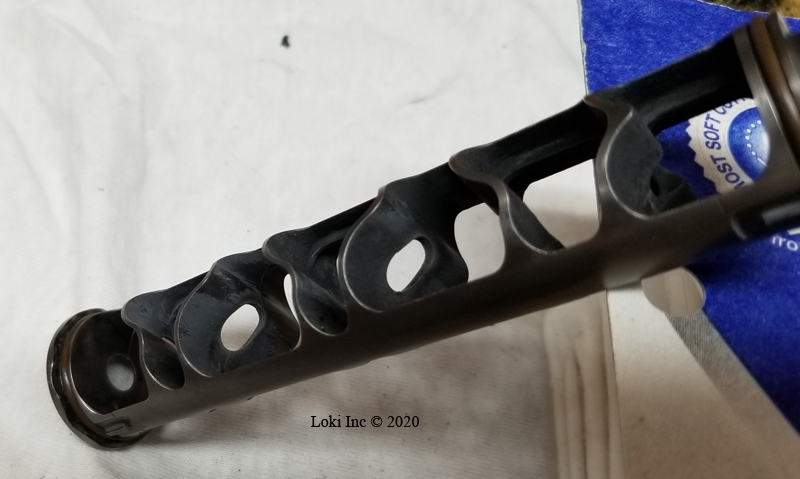
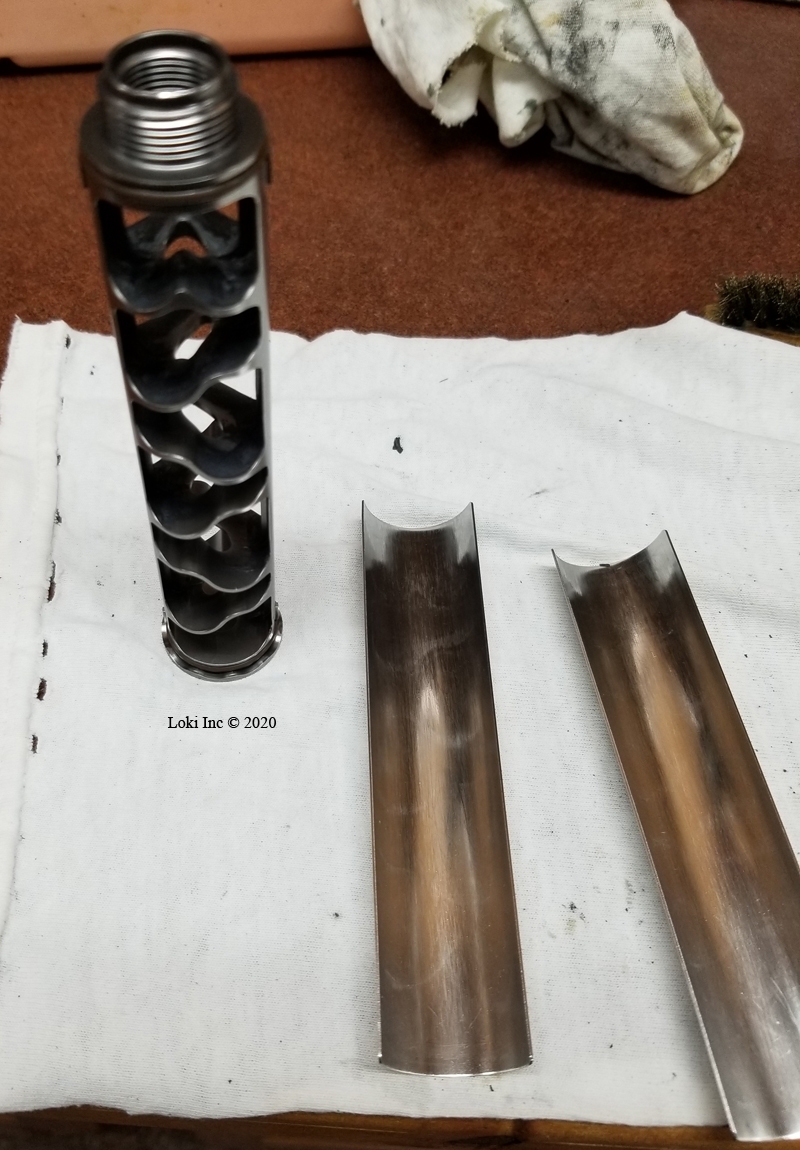
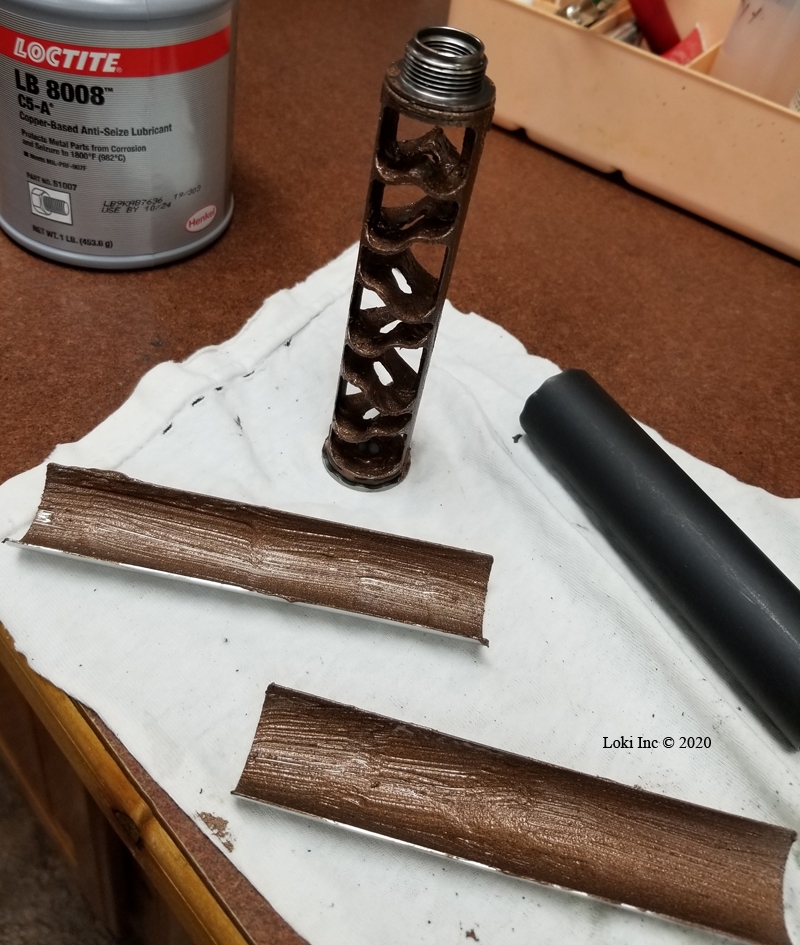
Learning Center

Sparrow 22 Suppressor Cleaning: 3 Types of Pretreatments

Share this article:

Sparrow 22 Suppressor Cleaning: 3 Types of Pretreatments

Jason Baird

Jason Baird

The Bomb discovered that there’s more to cleaning a rimfire suppressor than a wipe down. Find out which three types of pretreatments he used on the Sparrow 22.   

I don’t know about you, but I do not like to clean things unless the cleaning process is pretty simple and doesn’t take long. This is probably news to my wife, Barb, and other people who know me pretty well. I am not OCD about cleaning (anything). Keeping my stuff clean was drilled into me forcefully, however, as a Zoomie at the Air Force Academy way back when.

As I aged, experience reinforced that concept, particularly in the areas of tools and equipment. I learned that some things needed cleaning more thoroughly, such as the items I depended on for safety or life. Other things would still function with a “lick and a prayer.” 

Why Clean a Suppressor?

In my world, since I don’t depend on a suppressor for safety or life, one might assume that I could get away with a quick suppressor wipe down after using it. It turns out that is true when it comes to centerfire suppressors, as the experts tell me those cans are pretty much self-cleaning with use. Unfortunately, rimfire suppressors are not so easy. Since I really enjoy shooting suppressed .22 rifles and pistols, I did some research to see if there is anything I could do to make the cleaning of .22 suppressors easier.

Results

I’m presenting the results of my efforts in two parts. First, this blog will cover the effectiveness of pre-shooting treatments. Then, I’ll follow it with a cleaning method I learned about on my SilencerCo plant tour that doesn’t require pretreatment.

Rimfire suppressor manufacturers purposely design them so a user can disassemble the cans for cleaning. Without cleaning, carbon and bullet metals (lead and copper alloys) build-up within a rimfire suppressor. This build-up causes lowered noise suppression performance. If allowed to continue, it degrades the weapon’s accuracy. The build-up could be hazardous due to bullet strikes on suppressor components.

First Go at Suppressor Cleaning

The first time I took apart a Sparrow 22 suppressor, after firing several hundred rounds through it, I had difficulty getting it broken down into its basic components. Carbon and metal had plated on the internal parts. Then, I started cleaning those parts using the chemicals and tools I use to clean the carbon off a bolt carrier group (BCG) of an AR-type rifle.

The chemicals and brushes worked OK – after a lot of elbow grease. Unfortunately, the bullet metals remained (not a problem with BCGs, since bullets don’t pass through them). I had to resort to scraping and soaking the suppressor parts in chemicals I use to clean jacket fouling out of rifle barrels. Note: If you use this method, be sure to remove the suppressor O-rings beforehand. Many of these cleaning chemicals are not kind to O-ring materials. My efforts made me resolve to find a better way to clean the can.

Starting point for cleaning test - clean Sparrow 22 suppressor disassembled

Three Ways to Pretreat before Suppressor Cleaning

Doing some Internet research led me to three different techniques/products advocated by “experts” to make suppressor cleaning easier. Each of these required pretreatment of a clean suppressor with chemicals used in other processes. Those chemicals included the following:

  • An anti-spatter spray used in MIG (Metal Inert Gas) welding to prevent the sticking of weld spatter to welded parts
  • A copper-based anti-seize paste used to lubricate threaded parts and to prevent them from sticking together under severe loads
  • FIREClean anti-fouling oil designed for use on firearm components to lubricate them and prevent fouling buildup

Using each in turn, I will describe my results below. Note that none of the companies selling the chemicals I used represented them as effective in preventing fouling of suppressors. Also, the prices I found for each chemical were not MSRP, but are for comparison purposes only. They were, however, valid at the link shown at the time of writing.

Anti-spatter MIG Welding Spray

After I had thoroughly cleaned the Sparrow suppressor, I used Weld-Aid Weld-Kleen Heavy Duty Anti-Spatter Liquid ($8.24 for a 20-ounce spray can) to coat its internal parts.

Sparrow 22 parts after spraying with Weld-Kleen anti-spatter treatment

Testing on the Range

Several days later, I installed the Sparrow 22 on my KelTec CP33 pistol (MSRP: $504). Barb and I did some slow- and rapid-fire training on paper and steel targets. We put quite a few 33-round magazines through the gun in the process. One of the great things about using the Sparrow 22 on the CP33 is that it allows me to run all and sundry ammo through the pistol. Unsuppressed, my gun is ammo-sensitive, and has difficulty digesting subsonic rounds.

After the range time, I took the Sparrow 22 apart, noticing that it was easier to disassemble than when it was dirty and not pretreated with Weld-Kleen.

Sparrow 22 suppressor disassembled after more than 100 rounds pre-treated with Weld-Kleen

About 90% of the carbon wiped-off, but removing the remainder required that I use powder solvent and a gun cleaning brush (with plastic bristles).

Fired Sparrow 22 core and halfpipes treated with Weld-Kleen after wipe down
Fired Sparrow 22 core and halfpipes treated with Weld-Kleen after solvent and brushing 1
Fired Sparrow 22 core treated with Weld-Kleen after solvent and brushing 2

Into the Brass Cleaner

After spending a few minutes attacking the remaining metal deposits with a scraper and ammonia-based chemicals, I punted and put the parts into my brass-cleaning tumbler. I use the usual Dawn/Lemi Shine/water/5-pound, *stainless-steel-pins combination. After three hours of tumbling, all of the metal deposits were gone. The Sparrow 22 stood ready for the next test.

*Please note that we do not recommend the stainless media for all rimfire suppressors.

Fired Sparrow 22 core and halfpipes treated with Weld-Kleen after tumbling with stainless steel pins

Copper-based Anti-seize Paste

For this test, I applied a coat of Loctite 51007 Copper LB 8008 C5A Anti-Seize Lubricant ($21.83 for a 1-pound, brush-top can) to all the Sparrow 22’s internal parts.

Core and halfpipes after Loctite Copper anti-seize application

More Testing on the Range

A few days later, we took the Sparrow to the range and shot it on the CP33. We also shot a Ruger American rimfire bolt-action .22 rifle (MSRP: $359).

After about 150 rounds through the Sparrow, I disassembled it for cleaning. The results were the same as I achieved with the Weld-Kleen spray – I wiped most of the carbon off with a rag, and got the rest of it using powder solvent and a gun cleaning brush.

Sparrow 22 with anti-seize after firing
Sparrow 22 with anti-seize after wiping, solvent soak and brushing

Once again, rather than spending much time with a scraper, I used my brass tumbler to clean the remaining metal deposits off the Sparrow parts.

Sparrow 22 with anti-seize after tumbling with stainless steel pins

I had high hopes for the final test using the FIREClean oil, based on what I’d seen online and my experience using it on AR BCGs.

FIREClean Anti-fouling Oil

I followed the FIREClean ($29.90 for two, 2-fluid ounce bottles) instructions as I applied it to the internal parts of the disassembled Sparrow 22 suppressor, using a swab to be sure to get an even coat on the nooks and crannies of the baffles.

Sparrow 22 after treatment with FIREClean oil

Disclaimer: As I noted, above, the manufacturer of FIREClean, as with the manufacturers of other chemicals I used, does not make any claims about the use of FIREClean in suppressors.

Even More Testing on the Range

After a couple of weeks, I had the opportunity to test the FIREClean-treated Sparrow 22. Barb and I shot more than 100 rounds through her Volquartsen Scorpion (MSRP: $1673) and Sparrow 22 combination, as well as 50+ rounds through the Ruger American rifle with the Sparrow attached.

After our range session, I disassembled the Sparrow 22 for cleaning.

Sparrow 22 with FIREClean disassembled, dirty

As with the tests of the Weld-Kleen spray and the anti-seize paste, I had a much easier time getting the suppressor apart than I did when it was untreated. I wiped about half of the carbon off the parts with a rag, less than the results with the previous two chemical tests, and then re-coated the surfaces with FIREClean as I would if cleaning a BCG (the chemical is its own cleaner, according to the directions). After about an hour, I scrubbed the parts with my gun cleaning brush, removing most of the carbon deposits.

Sadly, as far as I could tell, none of the bullet metal deposits came off. Out of curiosity and hoping the FIREClean had worked better than the other chemicals, instead of throwing the lot into my brass tumbler as I had previously, I attacked the parts with a brass brush, AR BCG steel scraper and a dental pick.

Did the FIREClean make the process any easier than cleaning the Sparrow without any pretreatment?

In my opinion, it wasn’t any easier to get the bullet metals off the parts.

Sparrow 22 after FIREClean soak, brushing and light scraping

Conclusion: Is Pretreating a Suppressor Necessary?

So, was pretreating the Sparrow parts, whether with anti-spatter spray, anti-seize paste or special gun cleaning oil worth the effort? I’d say it was, but I’d be hard-pressed to say which was better with regard to the effort involved. If I had to make a choice among the three, it would be based on the cost of the chemicals and how many applications I could get out of a container of whichever one I chose.

It so happens that right after I finished this set of tests, I took the SilencerCo plant tour that I wrote about in my previous blog post. I mentioned to Josh Dietz (the PR Manager) that I had done these pretreatment tests. He told me the company engineers use a soda blaster to clean suppressors. Looked like a good idea, especially if I could get into soda blasting without too much of a cash investment. I decided to give that a try – I’ll report on my experience using soda blasting to clean the Sparrow 22 (and the Switchback 22) in my next blog post.

Share this article:
Other Related Articles:
CART
You're $175.00 away from free shipping.
Your cart is emptyReturn to Shop
Calculate Shipping
Apply Coupon
×
×

Cart